Downloading the latest Joomla version
Before we get started with the installation process you’ll need to download the latest Joomla installation package, which is a ZIP file you’ll need to save to your local computer.
We recommend that you download Joomla directly from the official website: downloads.joomla.org. There are two variations to choose from, look for the button labelled Download Full Package and click it to start the download.
Once the download is complete, extract the ZIP file to a new directory on your computer, ideally somewhere easy to find e.g. on your desktop directly.
Preparing to install Joomla in your webspace
There are two steps you’ll need to complete in preparation for installation:
Upload the Joomla files to your Server
Once you’ve identified the root directory for your domain (or subdomain) within your web space you’ll need to upload the files you extracted to the local directory here by FTP.
Most FTP tools will allow you to upload these files using a simple drag and drop. Note that depending on your internet connection the upload could take 10-15 minutes to complete. We suggest you use this time to drink a beer, since beer is great. Or do some yoga.
If you need more help take a look at our article on how to connect to your server via FTP which explains the idea and basic setup of a local FTP client.
Create a MySQL database
Once the Joomla files have been successfully uploaded you’ll need to create an empty database which Joomla will later use to store data, content and settings. Make a note of the name, user and password of your database … you’ll need these details again in a minute!
Now we’re ready to start with the installation!
If you’re unsure about how to manipulate databases, we suggest you read Accessing your Joomla database with phpMyAdmin, which explains the basics.
Installing Joomla
Open your browser and enter the URL of your domain/subdomain. Assuming the previous two steps were completed successfully you should be greeted by the Joomla Web Installer, which should look something like the screenshot below:
Page 1: Main configuration
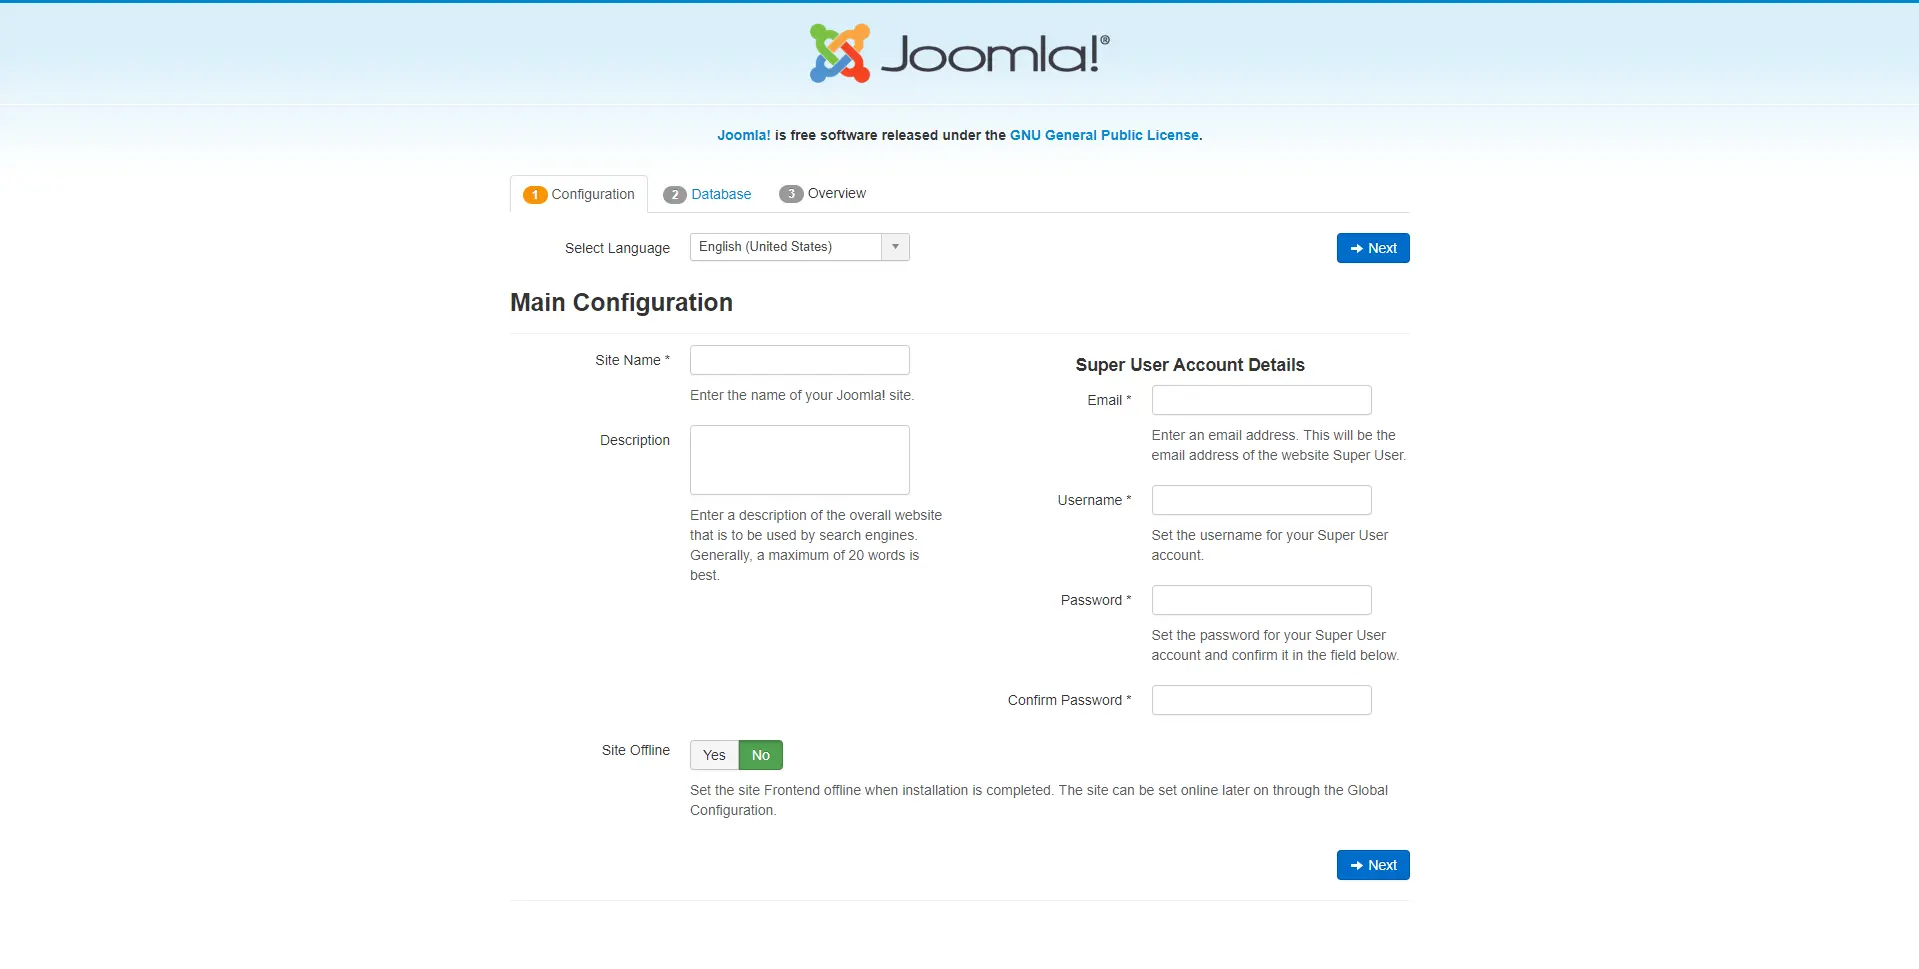
- Site Name: The name of your new site
- Description: A description of your new site (optional)
- Admin Email: Email address used for password recovery and system messages
- Admin Username: Your admin username
- Admin Password: Your admin password
- Site Offline: Select “Yes” if you want your website to initially be offline following installation. In this case the frontend of your site will simply display “Your site is offline” when you browse to it.
After completing the form click Next.
Page 2: Database configuration
You should now see the following page:
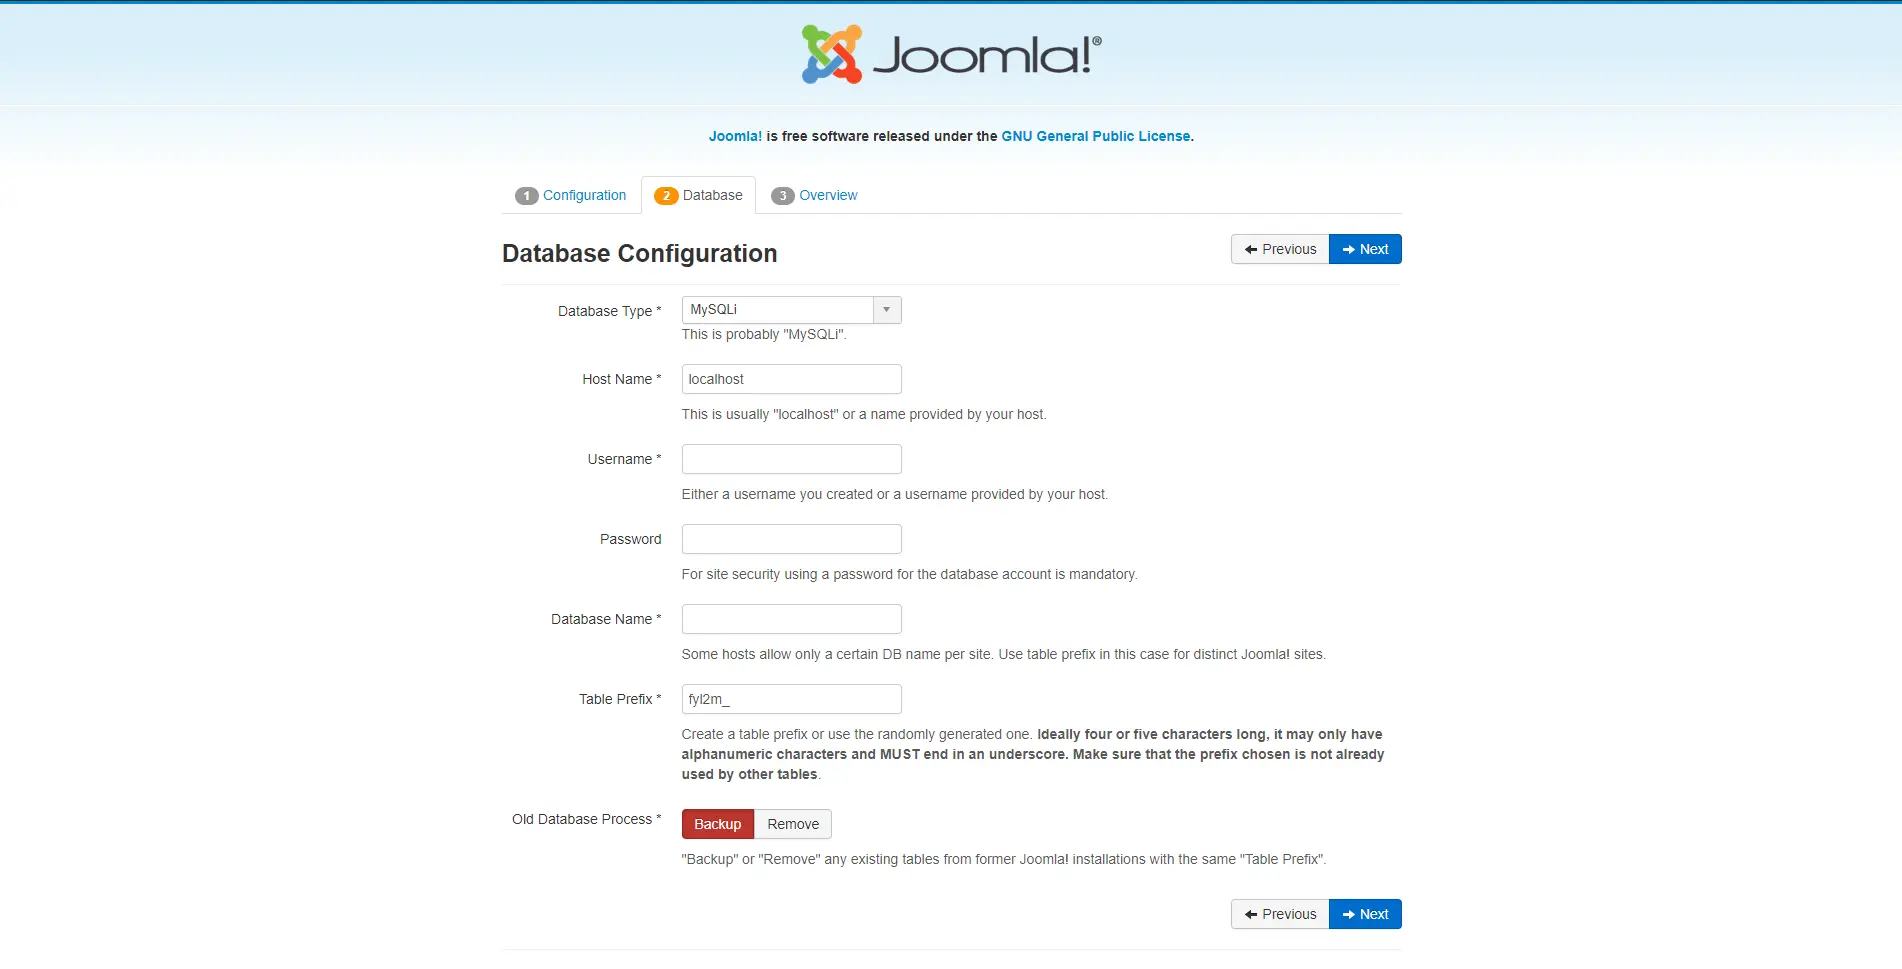
- Database Type: By default this value is set to MySQLi – no need to change this
- Host Name: By default this value is set to localhost – no need to change this.
- Username: Username for your MySQL database
- Password: Password for the MySQL database
- Database Name: Name of the MySQL database
- Table Prefix: Defaults to a random 3-4 character prefix – no need to change this.
- Old Database Process: Only relevant if you have any existing data in your database – no need to change this.
After clicking Next, you only have one more step to go!
Page 3: Finalization
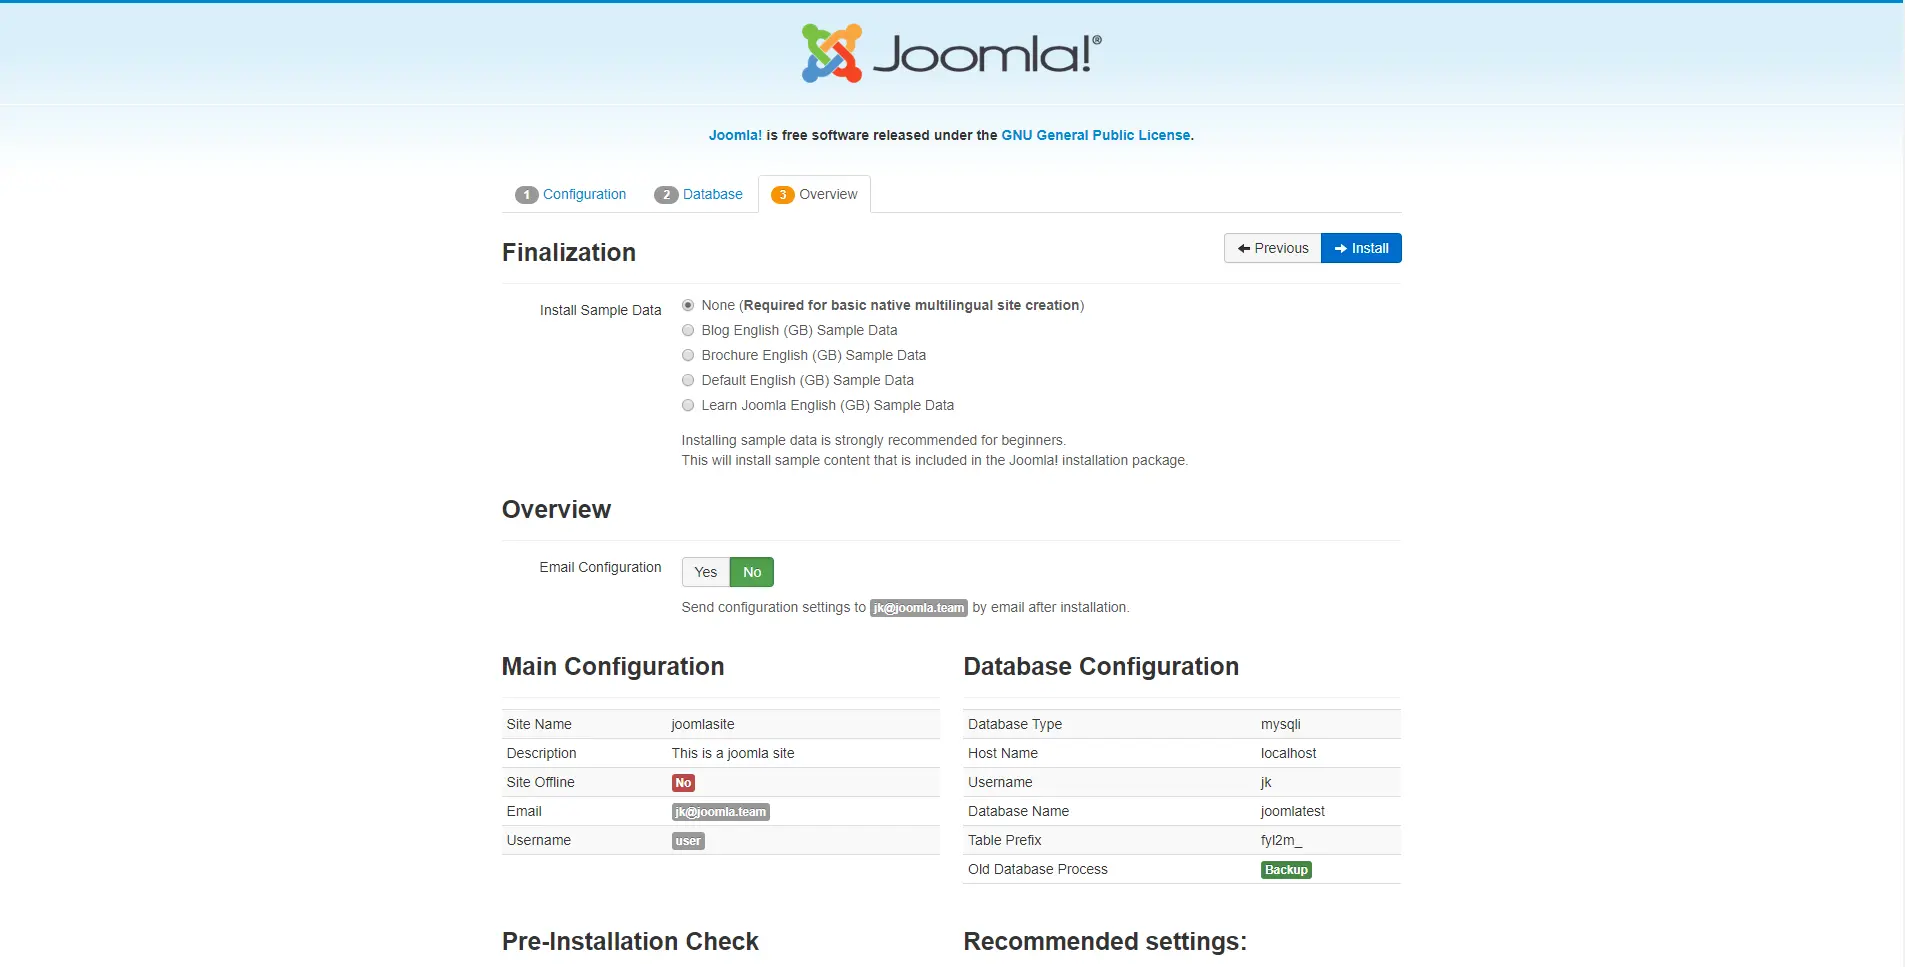
On this page you should be able to proceed with all of the default settings – click Next and wait for a few seconds.
Completing the installation
Finally you should see something like this:
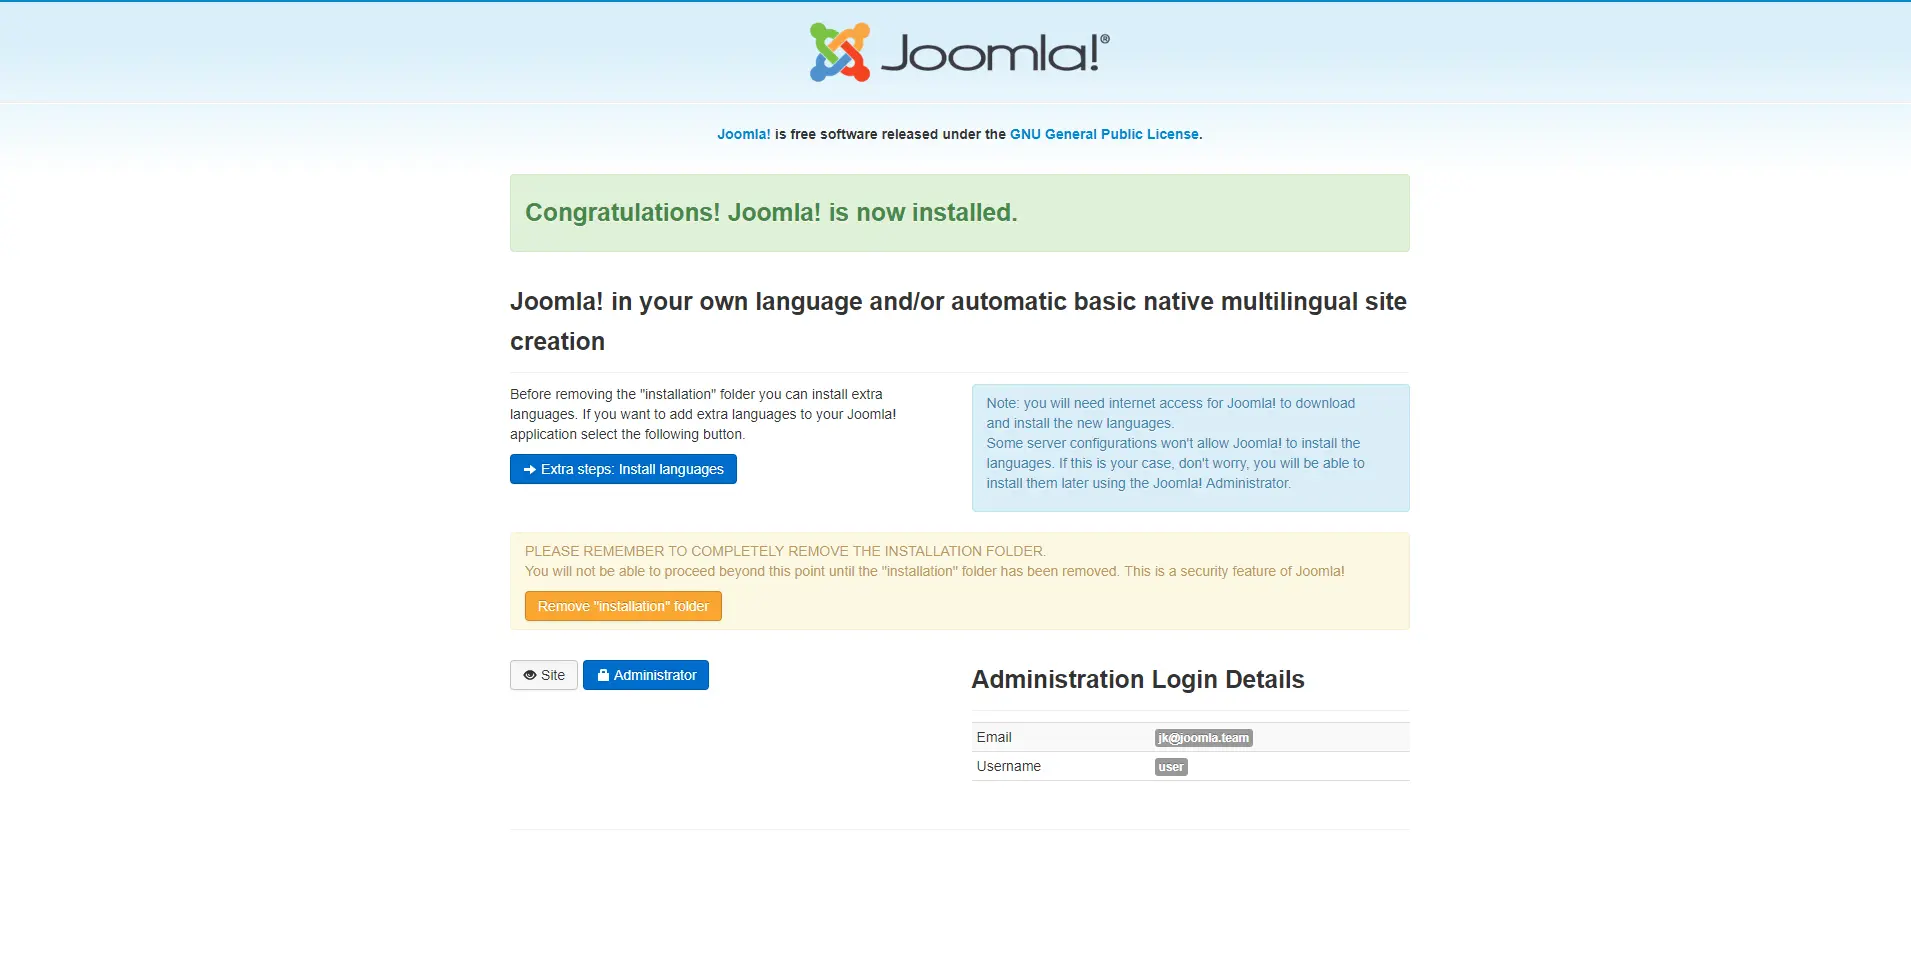
As a final step click the button marked Remove “installation” folder, and after a few seconds you should be ready to go. On the final screen you’ll see URL links to back the backend and frontend of your new Joomla site.
Congratulations, you’ve installed your first ever Joomla!
